Customer creation in SAP in CSI

Uncategorized
Step 1:- Click on SAP Logon from desktop & click on CRP.

Step:-Login with authorized username & password

Step 3:-You’ll be logged in to CRM.

Step 4:-Click Start the webclient UI

Step 5:-It will redirect to CRM webpage, login with same credentials again

Step 6:-Login page will appear as below.

Step 7:-Click on account management & select corporate account.

Step 8:-Corporate customer creation->enter full name,account group. Select Customer type depending upon the customer, address line 1, address line2,Legacy customer id(registered customers BNPL and Advance), city, pin code, country,region,language,post office and press Enter.


Step 9:-Click on the Change Template


Step 10 :-Click on Ok


Step 11:-Click on the Edit


Step 12:- Go to the billing tab and click on the own data. Selectthe customer group depending upon the customer type and click on back button to save.

Step 13 :-Go to Tax classification, click on the help button at Tax Type id and select all the applicable taxes.


Tax Group is selected as full for all the taxable customers and it is selected as NONE for all the non-taxable customers.


Select all the applicable taxes.


Step 14: Click on save button customer id is created.

Useful TCODE for viewing reports on CSI Environment

Uncategorized
Please view the pos cash report in zfi_pos_bal.

For tcb tcode is zfbl3n.

Daily acct tcode zfr_day_new

For total transactions for the office tcode zrev

For dpms summary report tcode is zmodvnsum

For beat creation tcode zmo_beat_create

For emo abstrat report zmoemoabstract

For manually paid emos
Zemopaid

Transaction for postbag
Zmo_postbag_display

For updating devilery table zmocodupdate

For biller display zfi_ereport

For employee personnel file pa10

for list of franking license zmo_fkg_licenses

HOW TO HIGH VALUE WITHDRAWAL IN FINACLE

Uncategorized

New Procedure for Higher value withdrawal approval of RICT at Account Office in Finacle


Many POs are still unaware about how to deal with Higher Value withdrawals. They just manually verify and send voucher Back to BOs and due to this Requested withdrawal amount goes under lien and BPM can not affect payment. 

the procedure for Higher value withdrawal approval of RICT BO A/c’s in Finacle is as Under

1-Invoke EXCW menu

2-Select Function as MODIFY

3-Enter A/c Number

4-Click on Search mirror in the field of REQUEST ID

5-Select the request Id and make sure that the amount shown is as is in SB-7 form

6–Click on GO

7–Check and verify Sign using F9 or Signature icon.

8-After tallying sign, select APPROVE/REJECT in ACTION field drop down list.

Then simply click on OK button and now it’s all done

Send that voucher Back to BOs

Note. – Now BPM should use higher value withdrawal option in MCD not a simple cash withdrawal option to make payment.

You can download SOP from given below download link

Complete Workflow of a SubOffice from Day Begin to Daily Account Generation

Uncategorized
Complete Workflow of a SubOffice from Day Begin to Daily Account Generation
To Start the work in CSI SOFTWARES First do the following:

In the Server system run the following components one after the other only present in the path C:\POSTALPOS_BO\

a) Start Database Server
b) Run_Mobilink_Client_Daily
c) Run_Mobilink_Client_High

The modules for day to day operations in Post Office (Facility) include

  • POS BACK OFFICE (for all supervisory activities)
  • POS COUNTER (for all counter operations)
  • POS BACK OFFICE IPVS (for despatch of counter booked, postman &
  • BO return/redirected mails)
  • DPMS (for Delivery and MO Payments including BOs)
  • F&A (all accounting work)

    Solution for Database connection failed issues on CSI POS

    Uncategorized
    Below solution process in case of any office face issue in Data Base connection fail in POS login.
    1.Goto 

    2.goto database_build

    3. Click on PMT.zip file and it will download

    4. Extract the file

    5. Click on start.bat

    6. Enter the ip address and browse the destination folder to save

    7. Click generate

    8. Copy po_connection.db file generated to the below path

    C:/POS/Application/BO/build/db_con

    And

    C:/POS/Application/Counter/build/db_con

    f-58 process in CSI- SAP

    Uncategorized
    In this article I’m going to explain cheque issue procedure within the office for any kind of payments (RD closure, PPF withdrawal, NSC/KVP discharge, PLI maturity payment etc). Head post offices or LSG offices are eligible for issuing cheque for these kinds of payments.
    For example, when a customer comes for RD closure and he demands for cheque instead of crediting to his SB account in the same post office then, the Postal Assistants in the counter will create a cheque request in SAP module as I have explained in previous article. The Treasurer will issue the cheque for respective payment.
    How to issue a cheque in SAP?

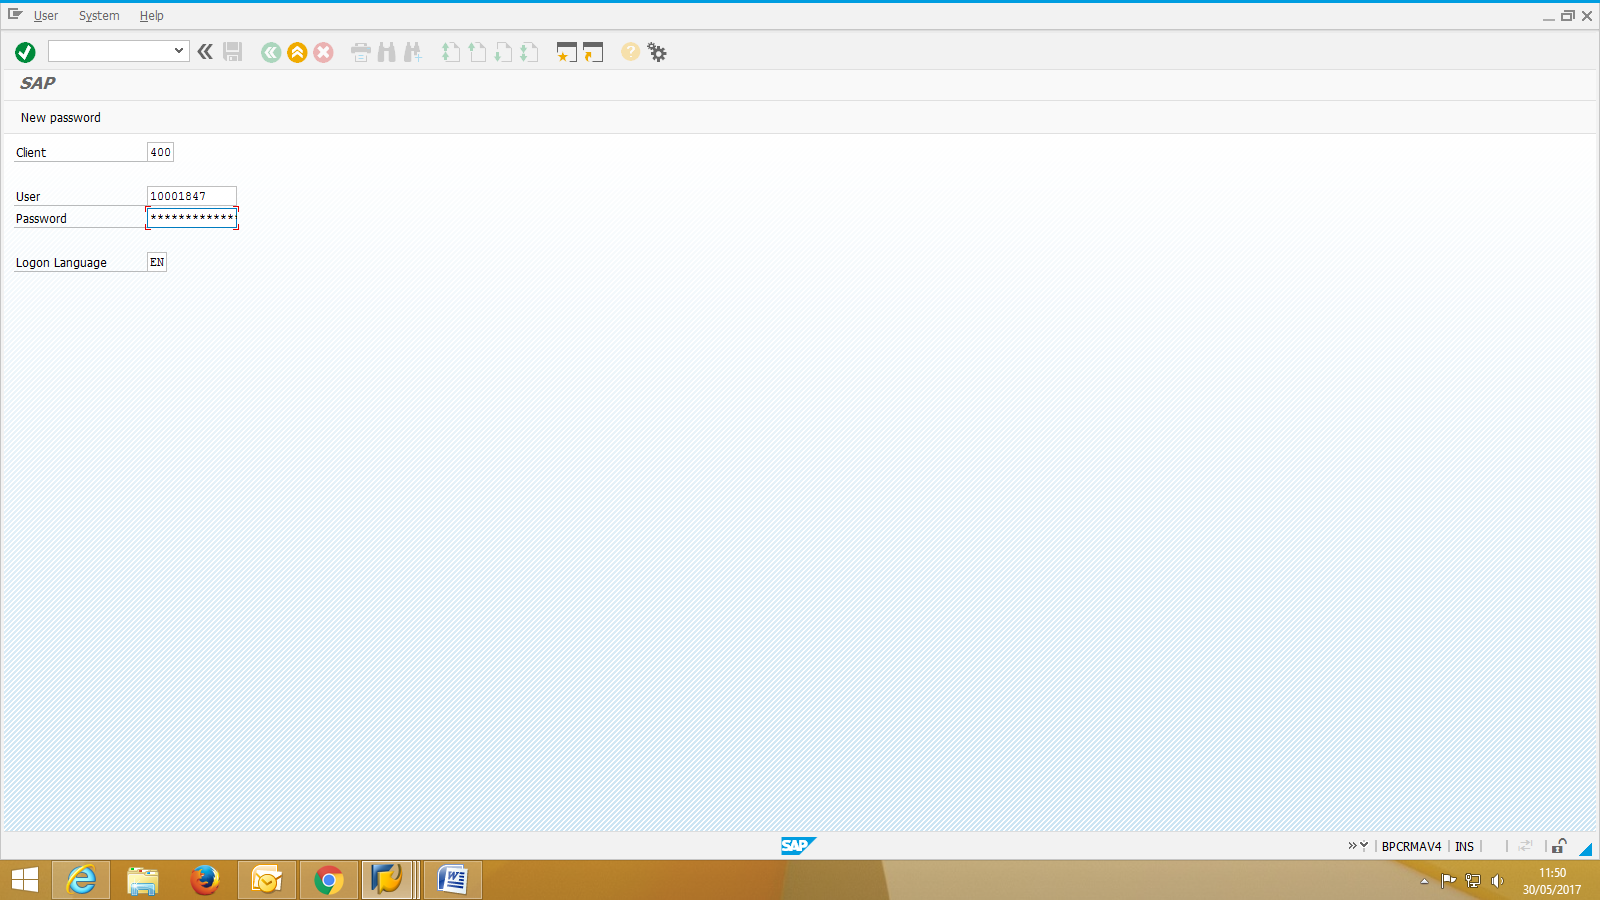
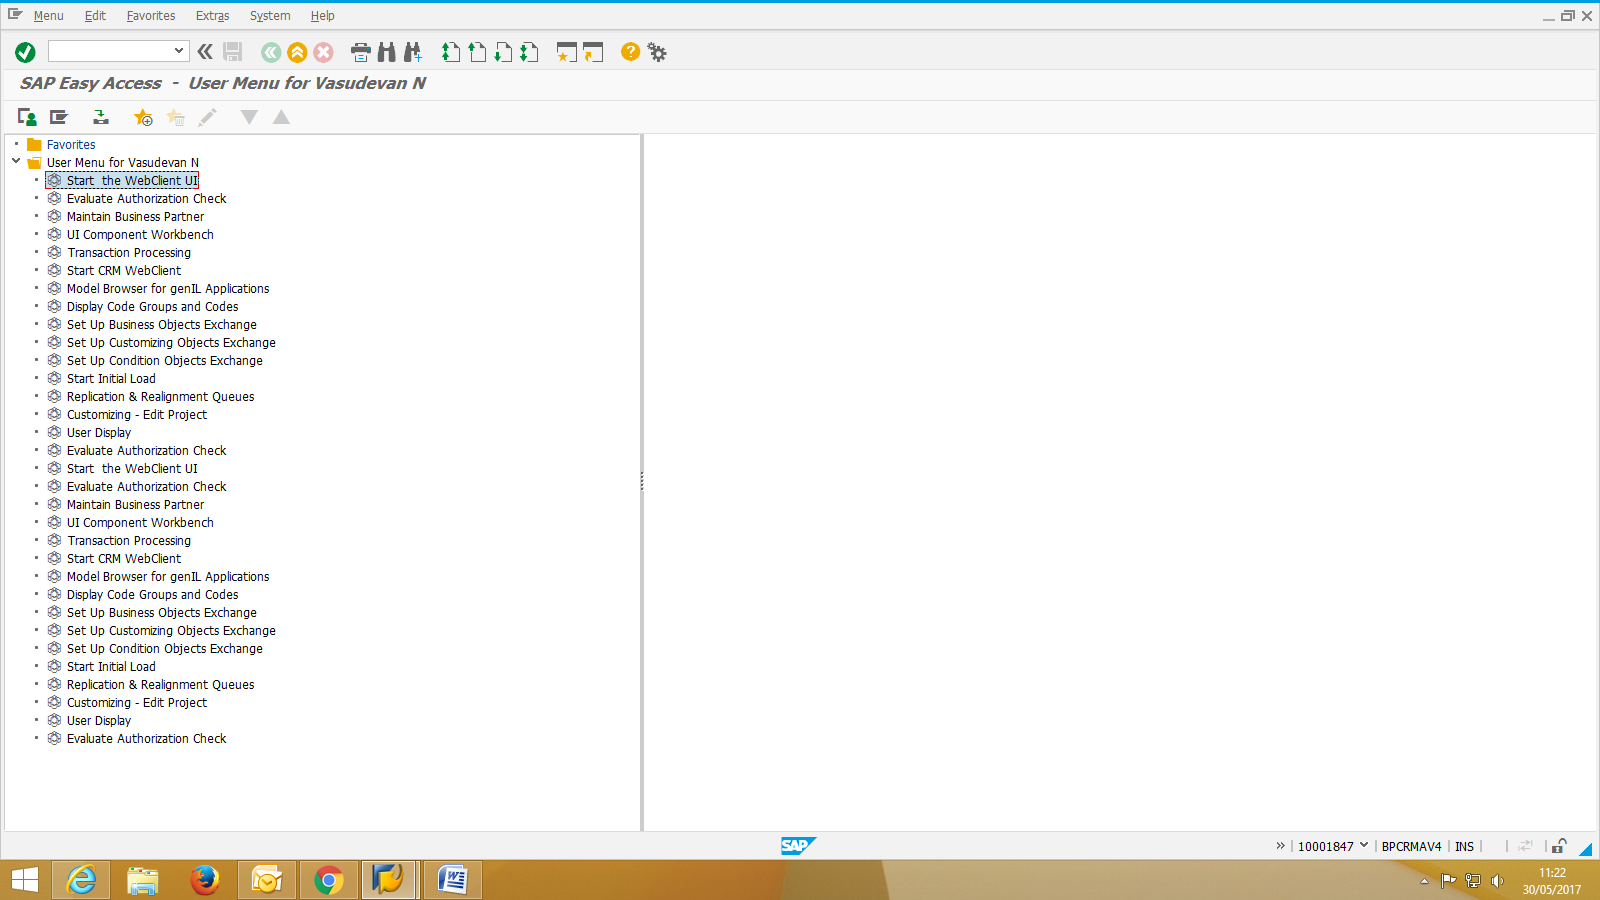
    Go to SAP module, Type T-code F-58
    Company code DOPI
    Payment method C (cheque)

    House Bank AP001 (Enter bank house no. allotted to your office)
    Account ID D001
    Check lot number 001(as new cheque book is added to system, it will increase by one eg.002, 003,004,005)
    Printer for forms PDF

    Now, click on Enter Payments on the top of the window. You will redirected to below window.


    Enter the following details.
    Document Date Current date

    Type DZ (customer payment)
    Company code DOPI
    Period 6(current month)
    Currency Inr
    Clearing text Type related to transaction or a/c no.
    Ammount 45176
    Customer One time customer number (Eg.1000000294)

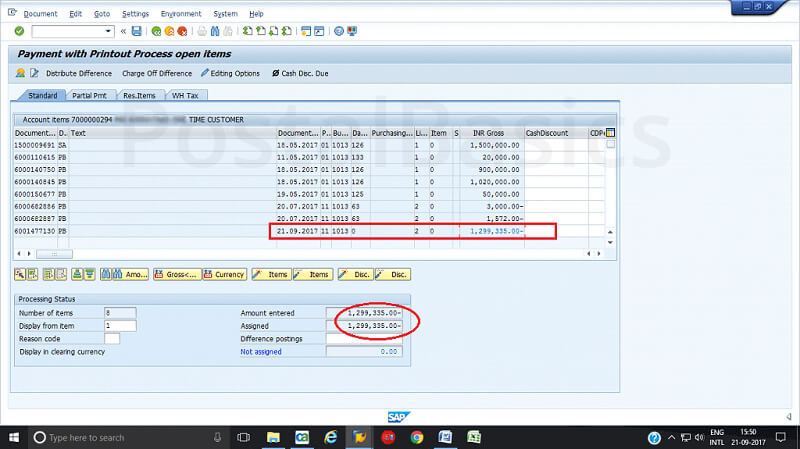
    Now, click on Process open item, the following screen will appear.


    • Here, the entered amount and assigned amount should be same. For that, you have to follow these steps.
    • First click on select all (3rd icon), Next, click on de-active items as shown in figure.


    Now, the assigned amount will be zero. Here is a screenshot depicting the same.


    Now, you should select the amount from the list so that it will tally with the amount which is entered. See the below screen where both amounts are equal.


    • Once you have confirmed the amount, click on Document » Simulate
    • You will see this screen.

    In this window, you will see only one entry on the screen that is drawing from bank. In order to complete the work, click on that credit entry. You will see this pop up.


    Here, enter the profit center number of you office. Then click on Document » Simulate. The following window will appear.


    Click on save. Now, a document will be generated. Click on ✓ mark. A new window will pop up.


    Click on Lists. The below screen will appear.


    Click on the document icon. Now this screen will appear.


    It is for the confirmation of cheque number used for this payment.